Install the software from the manufacturer's website: quantexlab.com/en/download.html
(according to the type and bit depth of the operating system).
ScanDoc for Android (minimum version 6) can be downloaded from the official Google Play store.
The ScanDoc program for iOs (minimum version 10) can be downloaded from the official App Store.
Launch the new ScanDoc software on your computer or mobile device using the desktop shortcut.
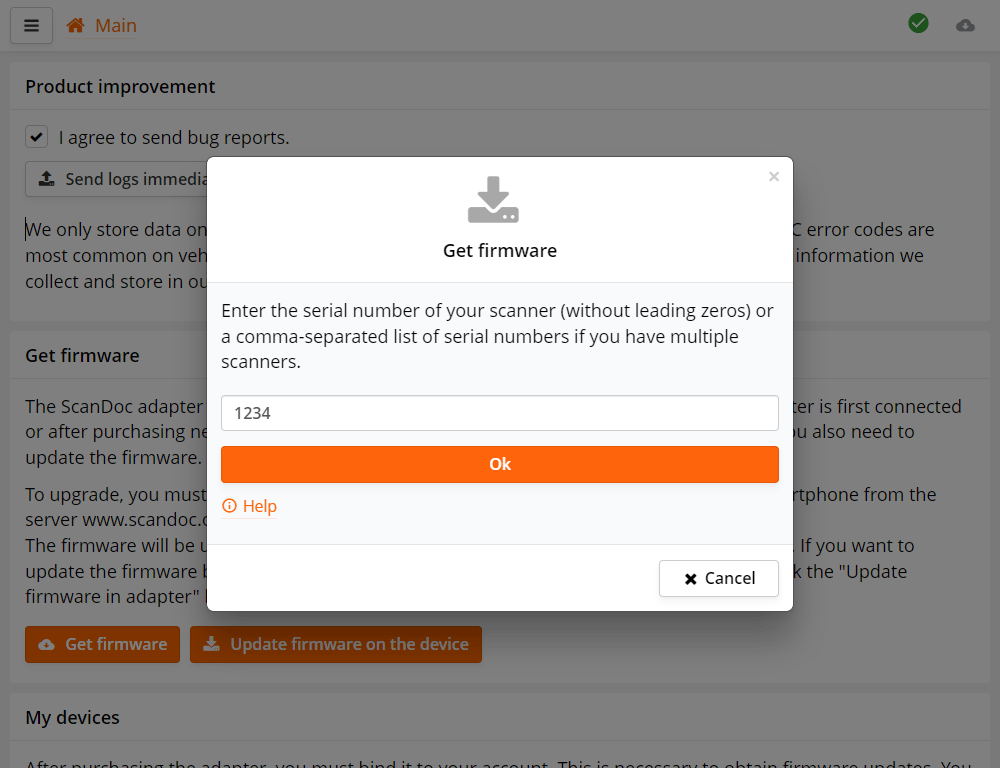
When you first launch the program, a form for entering serial numbers will appear. Enter your scanner's serial number.
If you have multiple scanners, enter their serial numbers separated by commas, for example: 25478, 1230.
The program will then automatically download the firmware files and the vehicle make files from the internet for your scanner.
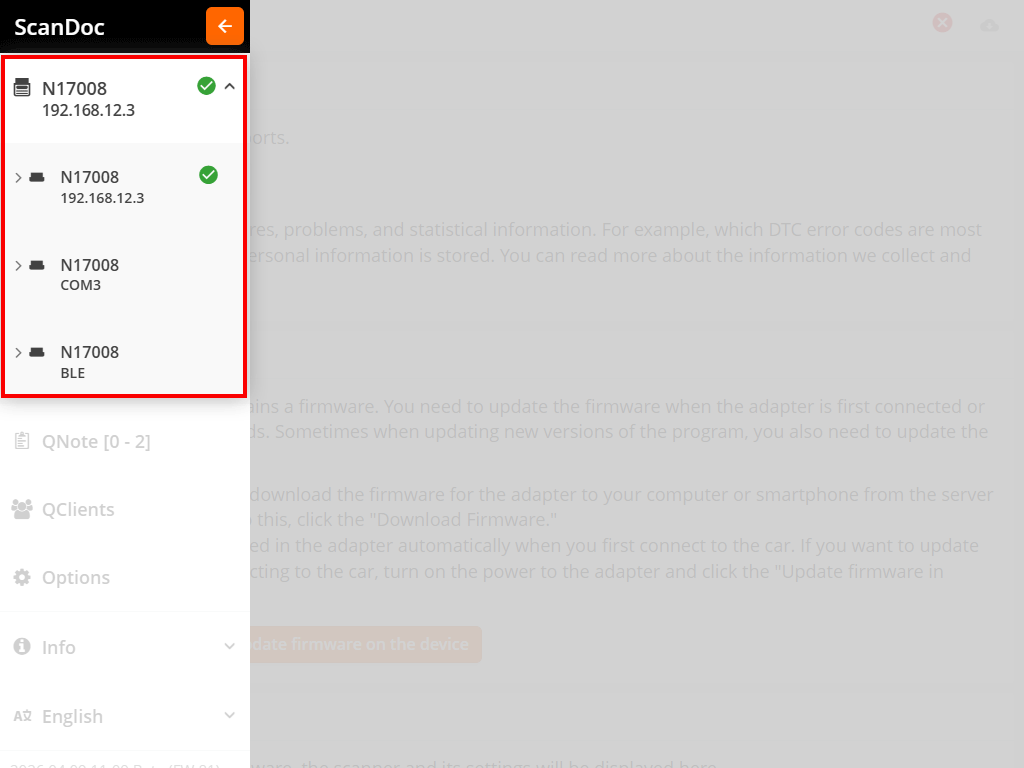
In the program, click the button at the top of the window, an additional side menu will appear.
Select the communication channel you want to use to connect to the interface. The selected channel will be shown at the top of the menu.
On a computer, three communication channels are available: WLAN, BLE and USB. On mobile devices, only WLAN and BLE are available.

On your computer or smartphone, open the list of available WLAN networks and connect to your interface's network.
The network name matches the scanner's serial number, and the password is the word scandoc followed by the serial number without the letter.
For example, if your scanner has serial number s/n: N17008, the network will be named N17008, and the password will be scandoc17008.


BLE pairing happens during the first connection to the device. During step 4, when updating the firmware, select the BLE connection. After a few seconds, a window will appear on the screen asking for the pairing password — the password must be entered in that window.
The password (PIN code) is the scanner's serial number without the letter.
For example, if your scanner has serial number s/n: N17008, the password will be 17008.
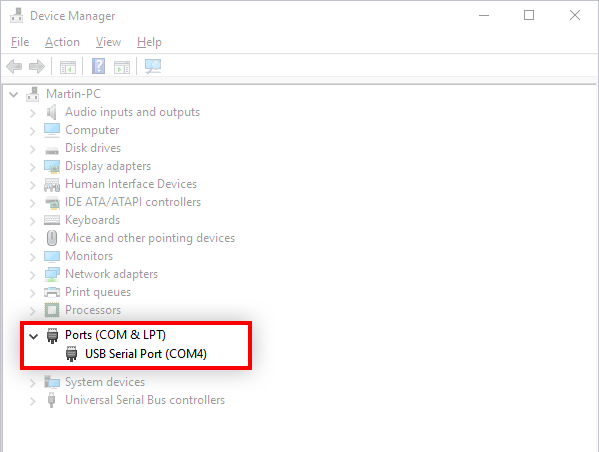
Connect the interface to your computer with a USB cable. The first time you plug it in, the operating system automatically detects the interface as a Virtual COM Port and installs the required drivers. On modern versions of Windows 10/11, macOS and Linux the drivers are installed automatically, no further action is needed.
Once connected, open Device Manager and find the name of the port the interface is attached to:
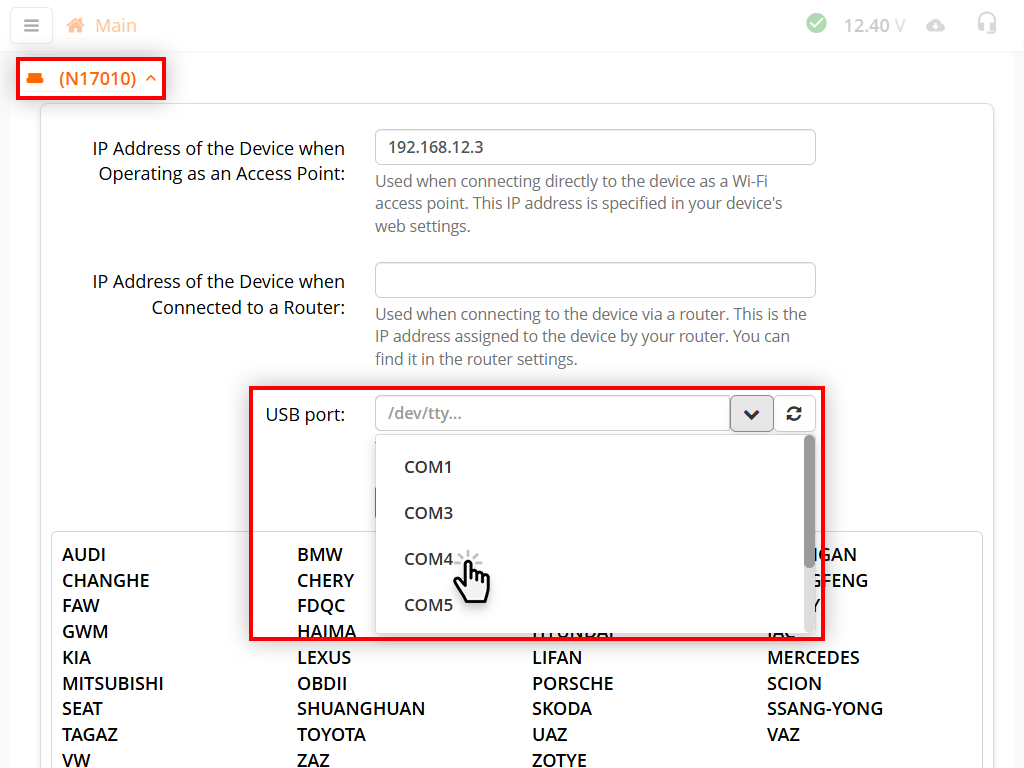
ls /dev/ttyUSB* or dmesg | tail in the terminal right after plugging in the cable. The port name typically looks like /dev/ttyUSB0.ls /dev/tty.usb* — the port name will look like /dev/tty.usbserial-XXXX.Enter the port name you found in the ScanDoc software settings, in the corresponding field of the selected device.
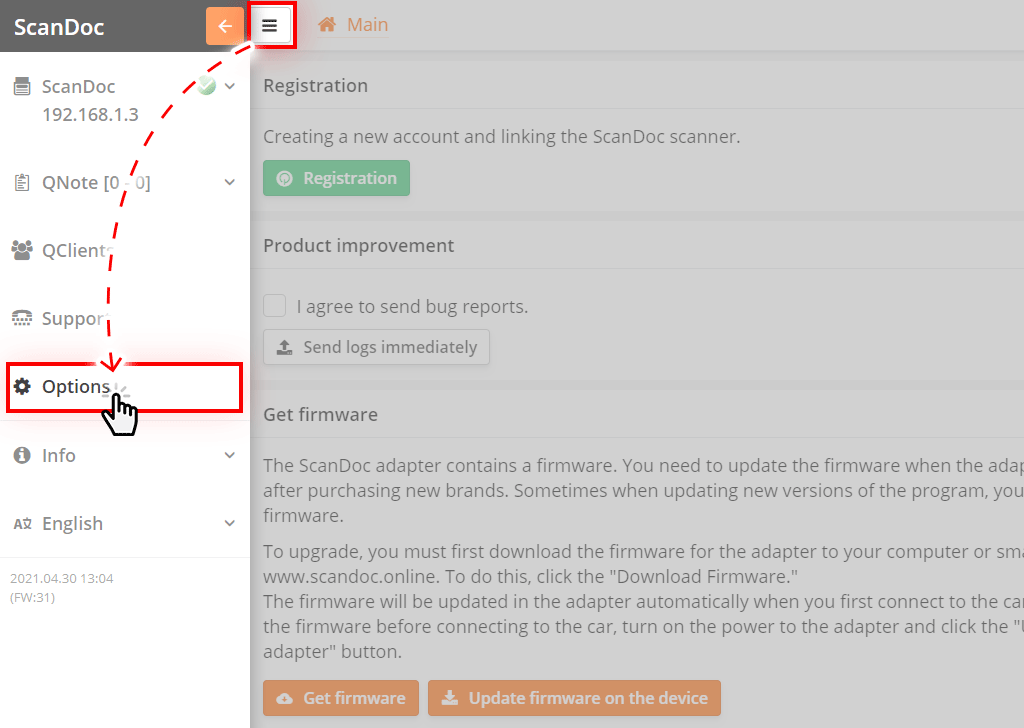
In the program, click the button at the top of the window, an additional side menu will appear.
Click the "Settings" button in the side menu, you will be taken to the program settings window.
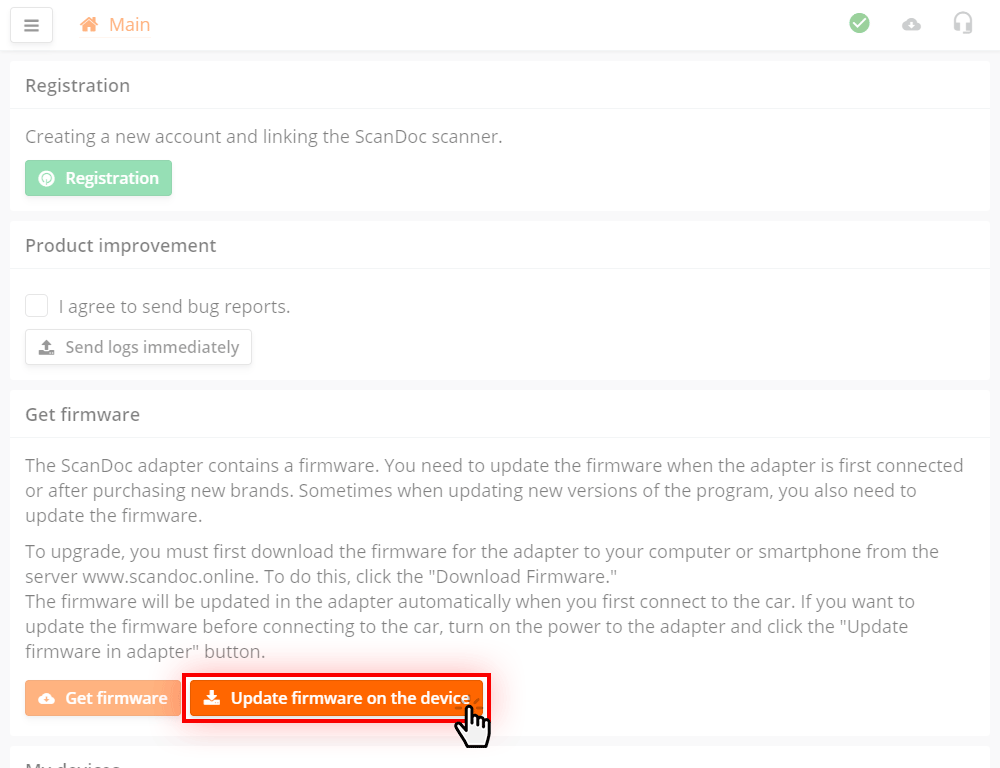
In the options window, click the Update firmware on the interface button
The firmware will be written to the scanner. The device is now ready for use.
If you're not yet familiar with the ScanDoc software, you can read the detailed user manual.
A few important features that are useful to know about when using the interface on a daily basis.
When powered on (connected to the OBD-II port), the interface is ready to accept connections over all available channels — WLAN, BLE and USB. As soon as the first connection is established, the other channels are automatically disabled, and the interface operates only on the selected channel until the power is cut off.
The number of devices that can be paired with the interface is limited and is defined in its settings. By default, the interface remembers only one device — so even after the power is cycled, other phones and computers will no longer be able to connect.
To remove a previously paired device or to increase the maximum number of pairings:
If there is no communication with the program for more than 3 minutes, the interface enters sleep mode to avoid draining the vehicle's battery.
The interface wakes up automatically when the engine is started and continues to operate on the same communication channel it was using when it went to sleep.


